| Performance Newsletter |
Vol. 19, Fall 2010 |
Time Out
by Peter Nicholson
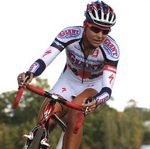
It's the end of the season for many athletes. But once the racing is done, many people rush right into getting ready for the next season. That's OK - as long as getting ready means taking a break. After a long year of races, travel, and high intensity training, the single most important thing one can do to ensure you'll be stronger come the spring it to hang up the bike.
By the Seat of Your Shorts
by Dario Fredrick
In my last fitting article, Start at the Foot to Reach the Peak, we examined the importance of proper foot connection to the bike and how this first of three contact points sets the biomechanical tone of your fit. Once the feet are well connected, the next contact point in the fitting process is the saddle. With so many saddle options and degrees of comfort, picking the right saddle can become an overwhelming task. Understanding the variations in saddle shape and placement can make the task seem much easier...More>
Cycling in Wet Weather
by Dario Fredrick & Peter Nicholson
Rain. For many cyclists it means indoor training or taking a rest day. But with the right equipment, gear and mindset, most wet days can still be productive training days and perhaps even enjoyable.
Getting a New Bike? Get Fit First!
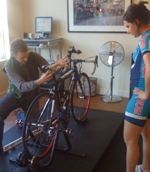
Fall is a great time to purchase a new bike. The next year’s models are out so you can pick up the latest and greatest, or you can scoop up a bargain on current model year rides that shops are eager to move off the floor. But before you pull the trigger on your dream ride, come down and let us make sure it will be the right size.
With such a wide variety of geometries and bike models out there, it can be overwhelming selecting the right one...

Tuning Your Mountain Bike Suspension for Optimal Performance
by Nitish Nag
Suspension tuning is a key component for getting the most out of your expensive bike. Many riders set their suspension according to the books and never touch it again. This system is fine if you are recreationally riding and do not want to hassle over your suspension.
Welcome New Whole Athlete Coach Ben Ollett
Ben has been coaching cycling for nearly ten years and has worked with all levels and disciplines of cyclists. His athletes have won a total of nine US National Championships including six in the Pro Women's Mountain Bike category and three at the U23 level. Ben graduated from Rutgers University with a BS in Exercise Physiology and is near completion of a MS in Sport Pedagogy from the University of Northern Colorado. Ben's coaching philosophy focuses on the development of the physical, intellectual, and psychological aspects of athletic performance...More>
Desire
by Marvin Zauderer
Tell the truth: How much do you want it? Desire is rocket fuel for your cycling experiences. It can get you over fear. It can give you access to your deepest sources of energy, strength, and power. It can make the difference between missing out and getting the most from your cycling – and yourself. The mentally fit cyclist knows how to tap into every possible ounce of desire in reaching for goals, growth, and fun on the bike.
Whole Athlete Cycling Team Completes Hugely Successful 2010 Season
In only its second full season, the Whole Athlete Cycling Team has made strides few thought possible. With 75 wins, over 200 podium placings and 270 top-10 finishes, as well as qualifying four juniors to the World Championships, the Whole Athlete Development Program has demonstrated its success far beyond expectations. But success is not measured merely by race results. In 2010 Whole Athlete kids experienced travel, elite-level training camps, national and international racing, and the opportunity to give back to the community through volunteer work. They've embraced the philosophy of balancing dedication, integrity and fun, while sharing the real success that comes from working as a team.
For more information on how you can help our youth and the future of cycling, please visit http://www.wholeathlete.com/team.htm and http://www.velodevelopment.org/.
Product Spotlight: Bont Shoes & Fizik Versus Saddles
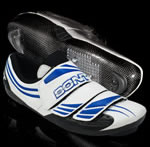
At Whole Athlete, we are constantly looking for new ways to improve your comfort and performance on the bike. Bont shoes, with their fully heat-moldable soles, are our latest discovery. The concept is simple: warm the shoe up in an oven, put it on your foot, shape the sole of the shoe so it conforms precisely to the sole of your foot.
Holistic Performance Newsletter - Vol. 19, Fall 2010
Time Out!
by Peter Nicholson
It's the end of the season for many athletes. But once the racing is done, many people rush right into getting ready for the next season. That's OK - as long as getting ready means taking a break. After a long year of races, travel, and high intensity training, the single most important thing one can do to ensure you'll be stronger come the spring it to hang up the bike.
Effective training has many components: proper intensity, sufficient volume, intelligent nutrition and a balanced psychological approach. While each of these components plays a key role, the most important part of effective training actually happens when not physically training - during recovery.
I insist that my athletes take at least seven days off the bike, followed by a super easy week with no consecutive days of training. I also insist that they do their best (and this is a tall order) not to think even think about the bike, especially not to plan the next year's races. The season break should be exactly that - a break, not a pause. It should be a chance to focus on those loved ones who tolerate the cycling obsession, catch up on household chores, or just allow oneself to do absolutely nothing. Successful athletes know how to "turn it off," and use the extra time to maintain balance in their work and personal lives. A few weeks after the season break is a good time to start thinking about the next year. It's a good idea to keep the momentum of balance - involve your significant other in your plan to finally get that Cat 3 upgrade, check with your work partner to see if taking a week off in July to race Cascade is feasible. Bike racing requires intense amounts of focus, but that focus is best gained when all other parts of an athlete's life are kept in sight. Use the season break to maintain proper perspective.by Dario Fredrick
In my last fitting article, Start at the Foot to Reach the Peak, we examined the importance of proper foot connection to the bike and how this first of three contact points sets the biomechanical tone of your fit. Once the feet are well connected, the next contact point in the fitting process is the saddle. With so many saddle options and degrees of comfort, picking the right saddle can become an overwhelming task. Understanding the variations in saddle shape and placement can make the task seem much easier.
Pick the Right Shape
The main saddle dimensions to consider are width, lateral shape and lengthwise shape. Actual length is less important. The width of the saddle should accommodate and support the width of your sit bones (ischial tuberosity), providing a stable platform for the pelvis. Although the width dimension is measured at the widest point, keep in mind that you may not sit exactly on that part of the saddle. The lateral shape should also fit your sit bones, since the angle at which they contact a saddle can vary. This side-to-side shape ranges from flat and rounded and it becomes apparent right away which you might need by sitting on examples of each.
The lengthwise shape affects the distribution of weight along the saddle and can vary from flat to very “saddle” shaped. This is where channels and cut-outs come into play, designed to reduce pressure on the perineum or the “pelvic floor,” which otherwise can result in discomfort, numbness or nerve impingement. However, some cutout designs have minimal material or support in that area and can compress too much, ironically causing more pressure on the nose of the saddle. Channel-shaped designs have more recently addressed this limitation by using more material but with a groove instead of a cutout.
Firm or Soft
A saddle should not be too soft or it becomes unsupportive and loses its initial shape, often resulting in more pressure on the nose and even altering your saddle height as you ride. Softer saddles also tend to break in more, compressing to a point where it requires that you raise the saddle. Ultimately, the shape of a saddle is more important than the softness, and a relatively firm saddle with the correct shape will tend to be more comfortable and supportive in the long run.
A Fair Evaluation
The only way to give a saddle a fair evaluation is to make sure it’s positioned correctly for you. Saddle height and setback (relative to the bottom bracket) are really best determined through a proper fitting. There are many individual differences to factor into the process, from pedaling style, to body proportions, to injury history. If you do choose to set up or test out different saddles yourself, the first step is to level it. Make sure the bike itself is on a level surface and place a long leveling tool on the nose and the highest point at the back of the saddle. If a slight tilt is more comfortable, it’s fine to adjust it a little bit nose up or down, but avoid a large downward tilt. This will end up sliding you forward all the time, which reduces efficiency, adding unnecessary muscular work. If you feel too much pressure on the nose of the saddle and a very slight downward nose tilt does not eliminate it, the saddle is either the wrong shape or not yet positioned correctly. Increasing the nose-down tilt in this case might simply slide you onto the nose even more. For the fore and aft and height positions, make sure you are positioned over the center of the bike in a way that you engage the quadriceps, glutes and hamstrings, as well as allowing enough extension of the leg so that you can apply force through the entire downward phase of the pedal stroke without rocking your hips.
We tend to sit on one of two key locations on the saddle: The most comfortable contact point between body and saddle shape and the contact point from which the pedal stroke is optimal. Ideally, these should be one and the same. However, if you find yourself starting out in one spot on the saddle because it feels right in terms of contact and comfort, but then migrate to another place on the saddle when producing more power (e.g. sliding back when climbing), try adjusting the saddle in the direction you move to, combining the sweet spot of comfort with that of optimal pedaling mechanics.
Fit is Saddle Specific
Because shape, firmness and size vary among saddles, fitting measurements are saddle-specific. If you already have or take fitting measurements from your current saddle, changing the saddle likely means refitting it. Even two different saddles with identical width and length measurements may need to be positioned differently to maintain your position and proper fit. Where we sit on each saddle and where and how they compress can vary quite a bit. One size does not fit all and there are always exceptions and individual needs, which is why optimal bike fitting is a one-on-one, unique process for each of us.
Testing out and finding the right saddle means finding the right size and shape first. Be sure the width and lateral shape accommodate your sit bones and the lengthwise shape and firmness allow the right distribution of weight and pressure.
Whole Athlete can help you combine ideal comfort with optimal biomechanics when positioning the saddle. We stock a wide variety of test saddles of varying shapes, widths, and firmness that riders may use for a few weeks to confirm that their choice is the right one. Sometimes a saddle will feel fine on the bike on the trainer, but not be comfortable after an hour on the road or trail. If these saddle elements all seem to work with the bike stationary, the next step and true test is to take it out on the road, dirt or track and put a few miles on it. Observe if you feel stable in the saddle or if you feel the need to move around, especially when producing moderate to high sustained power. Once you’ve combined comfort with stability, you’ve found the right saddle.
Cycling in Wet Weather
by Peter Nicholson & Dario Fredrick
Rain. For many cyclists it means indoor training or taking a rest day. But with the right equipment, gear and mindset, most wet days can still be productive training days and perhaps even enjoyable. Winter temperatures in Northern California are relatively mild, but it’s also our rainy season. Coincidentally, this is the time that cyclists are ramping up their base mileage and building for the season to come. So unless you prefer to be a fair-weather rider, wet winters mean riding in the rain. Here’s how to get the most out of those wet days on the bike.
Equipment
Winterizing your bike starts with the tires. With wet roads and more debris on the road, heavier, more puncture-resistant tires are a must. There is nothing worse than getting multiple flats in the rain. Also, be sure to have two spare tubes and a good pump. You can run your tires ~5-10 PSI lower than you might on dry days to give a little more traction in those low-friction conditions.
Water and grit on rims can wear down brake pads at an alarming pace – it is entirely possible to run through a set of cheap pads in just one long ride that requires a lot of braking. Before you leave on a rain ride, check and make sure that you have adequate pad left and that brakes are properly adjusted, perhaps beginning the ride with pads a bit closer to the rim than normal to allow for wear.
Fenders are a must, particularly if you plan on any group rides. Training with friends goes a long way toward making wet rides more bearable – unless you’re getting a face full of rooster tail off the wheel you’re trying to hold.
More than anything, your fenders will keep you a lot dryer, as most of the drenching that happens comes from tire spray from the road. There are several styles of fenders, with the sturdiest requiring a frame and fork with eyelets, but quick-release style do an admirable job of keeping your friends (and your backside) out of the spray, attaching to any bike quickly with an easy to use, tool-free rubber grommet arrangement.
Apparel
So the bike is ready to roll, now for the rider. Staying completely dry in real rain (and being able to actually pedal your bike) just isn’t possible – even in truly waterproof garments like the classic clear plastic rain jacket you’ll end up getting soaked from the inside out due to excessive sweat. So the goal is a balance of water resistance, breathability, and warmth. Rain pants, however are not very practical for pedaling, so keeping the legs warm with quality leg warmers is a must.
Keeping your extremities warm in wet weather is of utmost importance – gotta feel your fingers and feet to be able to shift and pedal! Weatherproof gloves and booties are the way to go, with their lightweight, wind-proof material keeping the digits toasty. For really wet and cold conditions, we also recommend glove liners, which are remarkably inexpensive and effective at increasing the warmth of any glove.
For colder wet days, waterproof shoe covers do a great job, as some even combine a neoprene inner membrane with a waterproof shell. And while much of the heat we lose on the bike is through our heads, modern helmets are designed to keep you cool. A cycling cap from your favorite Belgian team may look pro and keep the rain out of your eyes.
Eye protection is a challenge when most cycling glasses either fog up or coat with beads of moisture. Ever roll out on a wet day wearing a pair of glasses, only to stow them in a pocket after the first five minutes of your ride? Spray from the road can be toxic for the eyes, given the by-products of autos (oil, rubber, brake pads, etc.). Try lighter colored lenses, such as clear or yellow tint and add RainX, an automotive product that repels water when applied to glass or plastic.
After the Ride
So you’ve outfitted your ride and yourself with the best gear, managed to get in a solid training session, and are back at home. Unfortunately, you’re still probably wet and cold and your bike is a mess. Look out for #1 first, and immediately change into warm and dry clothes, stretch out those tired muscles, and get something warm to eat and drink. When estimating your caloric output, keep in mind that the body spends extra energy regulating core temperature on those wet, colder days. Proper recovery is doubly important in inclement weather. Once you’ve stabilized, take a minute to give your ride some TLC. Even if it’s only rinsing off the muck and giving the chain some lube, spending a few minutes post-ride will greatly extend the life of the drivetrain. Once a week, it is also good idea to give your bike a proper cleaning with hot, soapy water, thoroughly lube the chain and derailleurs, and pull the seat post to allow any water that’s snuck inside to evaporate.
While nothing compares to a nice ride under blue skies, if you mind a few details you can achieve your training goals in even the worst conditions. Prepare your equipment, keep yourself warm and (relatively) dry, and take care of both you and your bike after the ride, and you’ll be ready to get back out there again tomorrow, getting stronger all the while.
Peter Nicholson is a freelance writer and competitive road cyclist in Northern California. When he’s not out training in the rain, he manages the Whole Athlete Performance Center. Peter can be reached via peter@wholeathlete.com.
Dario Fredrick is Director of the Whole Athlete Performance Center. He still rides his bikes rain or shine. Dario can be reached via dario@wholeathlete.com.
Getting a New Bike? Get Fit First!
Fall is a great time to purchase a new bike. The next year’s models are out so you can pick up the latest and greatest, or you can scoop up a bargain on current model year rides that shops are eager to move off the floor. But before you pull the trigger on your dream ride, come down and let us make sure it will be the right size.
With such a wide variety of geometries and bike models out there, it can be overwhelming selecting the right one. It is difficult to know what bikes will fit you best unless you know your optimal fit first. Your fit defines your bike. Your unique fitting dimensions are based on more than just your height, inseam or body proportions - they are defined by how your body integrates with the bike - by your biomechanics, flexibility and/or injury history. If you test ride bikes, remember that how precicely you are fit to the bike affects how well it rides.
With the Precision Bike Fitting for New Bike Purchase, we will fit you to your current ride, or use our Size Cycle fitting bike to determine your ideal fit. Then, based on your current measurements and after discussing your budget, preferred brands and shops, we will model potential bike options using BikeCAD to diagram how each bike will fit you, right down to the stem length and number of headset spacers. Finally, once you pick up your new ride, we will fine-tune your fit to complete the process. Don’t leave such a significant investment up to chance - let us insure that your next bike fits just right. To schedule an appointment, contact Peter Nicholson at peter@wholeathlete.com.
Tuning your Mountain Bike Suspension for Optimal Performance
by Nitish Nag
Suspension tuning is a key component for getting the most out of your expensive bike. Many riders set their suspension according to the books and never touch it again. This system is fine if you are recreationally riding and do not want to hassle over your suspension.
For riders looking to really milk the performance out of their rigs, suspension knowledge and tuning are key. Without the knowledge of how the suspension works, it is difficult to assess and analyze your suspension system. Let's go over some basics.
There are two components to a suspension system, the spring and the damper. The spring provides the force to suspend the rider from the ground and the damper controls the speed at which the spring moves. The spring is set based on the weight of the rider whereas the damper is set not only based on the weight but also on the terrain and riding style. An increase in damping further slows the rate of the spring. Picture a pogo stick. Without damping your suspension would act like a pogo stick going up and down at the fastest rate the spring can propel the weight. What a damper does is slow down the pogo stick so that you do not get bucked from your suspension (like a rodeo bull rider). Compression damping controls how fast the spring is squished down and rebound damping controls the spring as it returns back up. Furthermore, there are settings like lockout thresholds and much more that are specific to each brand.
The first adjustment that takes priority is the spring. Most shock companies base their recommendations on the spring settings purely on sag. While most of the time this works well, it is not customized for the particular riding style of the rider. If you are an aggressive rider you might want to run a higher pressure than recommended. This will prevent you from blowing through the travel on your bike when in an aggressive situation. It also helps keep your head angle slacker during hard turning, especially in berms where you reach a high G-force. A slightly higher pressure also helps prevent quick and premature brake dive. Some rear suspension designs heavily depend on an exact sag level such as virtual pivot point designs, and thus should still keep the sag level close to the manufacturer recommendation. Other designs like single pivots, Horst Link 4-Bar (aka FSR), and others are not so sensitive to changes in sag. Be sure to play around with your spring settings to really get a feel for what the suspension range is. A difference of 3 psi in air shocks is usually enough for an experienced rider to feel a change.
An accurate way to play with suspension is to use the bracketing system. In this system you do a practice run with a very low setting then a run with a high setting. See diagram below:
By using bracketing you can ensure that you have truly experienced the full range of the suspension settings and thus pick the best one for your specific needs. For those of you old school, die hard XC racers most modern suspension designs do not perform well if the pressure is too high, and this is a great way to reap the benefits of tuning. Mark your final desired pressures and damping clicks with a sharpie on the lowers or crown on the fork and shock. By doing this you will never need to worry about forgetting your correct settings.
The setting of the Lockout Threshold for many designs like the Specialized/FOX Brain, the FOX RP23 and, Manitou R-Type and Rock Shox Motion Control are varied in the way they work, but a general principle unifies them all. The “platform” should be set just enough so that the suspension is stiff while the rider is standing/sprinting/climbing normally, and not any higher. If you are coming off of a hardtail on to a cushy bike, the pedaling style is a bit different and you need to change your technique while standing especially. By setting the threshold at the bare minimum needed, the suspension can actually be active for the maximum amount of time. Any extra threshold for the platform does not provide additional efficiency! A trick for Fox RLC Fork owners to mimic a platform is to set the lockout blow-off threshold at the lowest setting, and then leave the lockout ON for smoother sections. The low blow-off threshold will give way relatively easy and mimic a platform design. The next major component of your suspension settings is damping. Compression damping for XC style bikes is usually set to be as low as possible (low = less damping = faster speed of the spring), without blowing through your travel. Set the compression damping so that you just minimally don’t bottom out your suspension (usually a loud clunk) on your rides. Thus you are using the full range of your suspension for the style of riding you do. If you travel to a location where the riding is rougher, you will need to increase the damping (to slow the rate of squishing the spring), so that you do not bottom out. The inverse applies when going from rough trails to smooth trails. Many bikes do not even come with adjustments for compression, because the manufacturer sets it to a predetermined level. If this is the case, do not worry! If you are in dire need to change the amount of compression for your weight/style/terrain, then there are several ways to do that. Since going over all the ways is complex (shims, drilling holes, stacks, and more), the most fool-proof way to do this is to change the weight of the damping oil to a thicker or thinner fluid. If not satisfied, then more advanced measures are appropriate. On the flip side (literally), we have rebound damping. An important concept to understand about rebound of the fork is packing. When you hit several bumps in a row very rapidly, you do not want the rebound damping to prevent the fork from returning to its full travel before the next bump. If the rebound setting is too high (the fork returns too slowly), then the fork will compress, and further compress, and eventually all your suspension will run out! For this reason, you want your rebound damping set so that packing does not occur. At the same time, you do not want to get bucked from the suspension, so the rebound damping should be high enough to prevent that. The best way to feel this (for both compression and rebound) is to use the bracketing system as mentioned above. An easy test to ensure your rebound is at a good starting point is the curb test. Set your rebound to full fast (least amount of damping). Then ride off the curb as a drop (landing with both wheels even on the pavement). The suspension usually will cycle twice or more, like a bounce. Start adding one click at a time an increase in the rebound damping until your fork only cycles once off the curb drop. This removes the oscillation of the bouncy fork, while ensuring that you are not using too much rebound that would cause packing. Almost all mid to high level suspension designs have a rebound setting. If you are riding really bumpy and chattering trails, you must especially pay special attention to packing and rebound damping settings.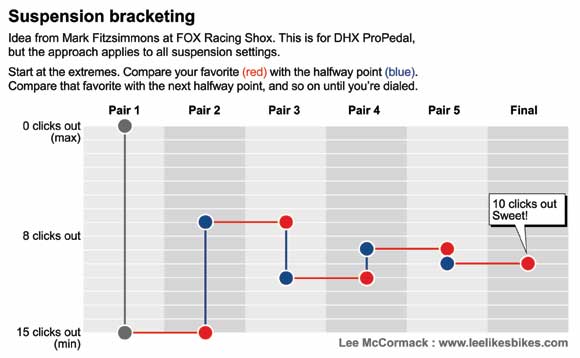 .
.
Now go out and test ride, tune and fine tune that suspension until it is dialed! Usually keeping a notebook of what changes you made prior to each “run” or small loop is useful to track what affects what. Another tip is to change only one thing at a time, then re-test the bike on the trail. Thus you will know which single change caused that difference. Otherwise you would be confused. Think of the basic scientific method when tuning (hypothesis, methods of tuning, keeping all variables except for one constant, noting results, interpreting what to do next). Good luck and hope to see you shredding out there!
Whole Athlete coach Nitsh Nag is currently completing a triple major at the University of California Berkeley in Molecular and Cell Biochemistry, Nutritional Physiology and Metabolism and Integrative Biology with an emphasis on Kinesiology. In his spare time he races pro on the mountain bike, recently landing on the podium at the US Collegiate National Championships in the Omnium (XC, STXC & DH). Feel free to contact Nitish at nitish.nag@gmail.com with any questions.
Bont Shoes
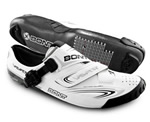
At Whole Athlete, we are constantly looking for new ways to improve your comfort and performance on the bike. Bont shoes, with their fully heat-moldable soles, are our latest discovery. The concept is simple: warm the shoe up in an oven, put it on your foot, shape the sole of the shoe so it conforms precisely to the sole of your foot. We do this here at the shop and you leave with your best-fitting pair of cycling shoes ever. The Bonts offer an extremely low stack height (distance between pedal and foot) and we are able to custom drill the cleat holes if your anatomy warrants it. Right now we are offering the a-one road shoe (just like new World Road Race Champion Thor Hushovd wears) and the tri-specific sub-9 for $399, plus the a-two and sub-9 for $315. For more information, visit http://www.bont.com/cycling
Fizik Versus Saddles
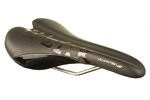
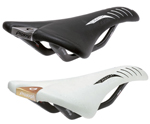
Fizik has established themselves as a dominant player in the saddle market and many of our athletes love both the long and flat Arione and the shorter, curvier Aliante. But some riders have found their perches to induce the dreaded perineal numbness. We all know numb is no good, so it's was with a sense of relief and excitement that we started carrying Fizik's brand new line of VS saddles. Basically, the VS line is your favorite Fizik saddles with a pressure-relieving channel. It's not a cut-out (which some riders find places too much weight on their sit bones) but a depression designed to be just deep enough to increase blood flow where you need it most. So drop us a line to check them out - we even have a few tester saddles in the studio. http://www.fizik.it
For more information, contact Peter Nicholson at peter@wholeathlete.com.
